Showing posts with label art. Show all posts

Sunday, January 3, 2016

BE THE GOOD


When I saw this sign on Pinterest, I immediately wanted it for my home.  With all of the awful things that we see on the news or read in our Facebook feeds, I wanted this simple, yet powerful, message to remind my family each day that there is still good in the world and it starts with them.

In our circle, we are blessed to have friends and family members with all different backgrounds and stories.  They have various religious beliefs, races, ethnic heritages, relationship statuses and sexual orientations.  Right now my daughters are just 3 years old and 9 months old so they are too young to recognize that these differences even exist.  Right now all my girls know is that these people care about us and we care about them.

I am not sure when it will happen but one day my girls will learn that differences do exist.  When that day comes, I want them to already know that different can still be good.  I want them to remember that one person's actions doesn't reflect the way all others think or act.  I want them to remember all the awesome people they have met and continue to BELIEVE THERE IS GOOD IN THE WORLD.  I want this to be instilled in their mind so when the day comes when they hear people saying ugly things about others, that my girls remember to BE THE GOOD. 

This message is such an important one to teach our kids as they grow up in a very different world.  I don't want all of the negativity in the world to drown out the positive.  Luckily for me, the pilot also got excited about having this message on display in our home.  He even did most of the work!

DIRECTIONS
We followed most of the instructions from the Blooming Homestead blog which is where I first saw this quote.  The pilot cut and slightly sanded wood from a pallet.  Then he stained it with leftover stain that he had from another project.  While I didn't download the file that you can access from the blog, I did use her dimensions for the stencils found here.  Instead of using cardstock, I used vinyl rolls in my Silhouette Portrait.  I realize that this was more expensive than cardstock but I wanted to make sure I did it well.
Since I used the more expensive vinyl, I wanted to save some money and not use the roll of transfer paper that I typically use with my Silhouette vinyls.  Instead I used Glad Press'n Seal plastic wrap.
 Together we carefully pulled off the Press'n Seal and laid down the vinyl on the wood.
I then used a vinyl scrapper to smooth out any air pockets.  You can also use a credit card to do the job.
Originally we thought to spray paint it but after discussing it, we wanted the sign to have more character.  One coat of hand painting would provide that look.  I used a flat paint brush and outlined each letter first to provide a nicer edge and then filled it in.
Before the paint could dry completely, I slowly removed the vinyl.  There were some paint that bled past the edges but I just used one of my Silhouette hooks to scratch away the paint.  Overall it turned out great!

Here it is at the top of our stairway, just outside all of our bedrooms. A perfect place for this important reminder.  Along with the cute little reminder of why I want to believe there is good in the world :)


Friday, August 31, 2012

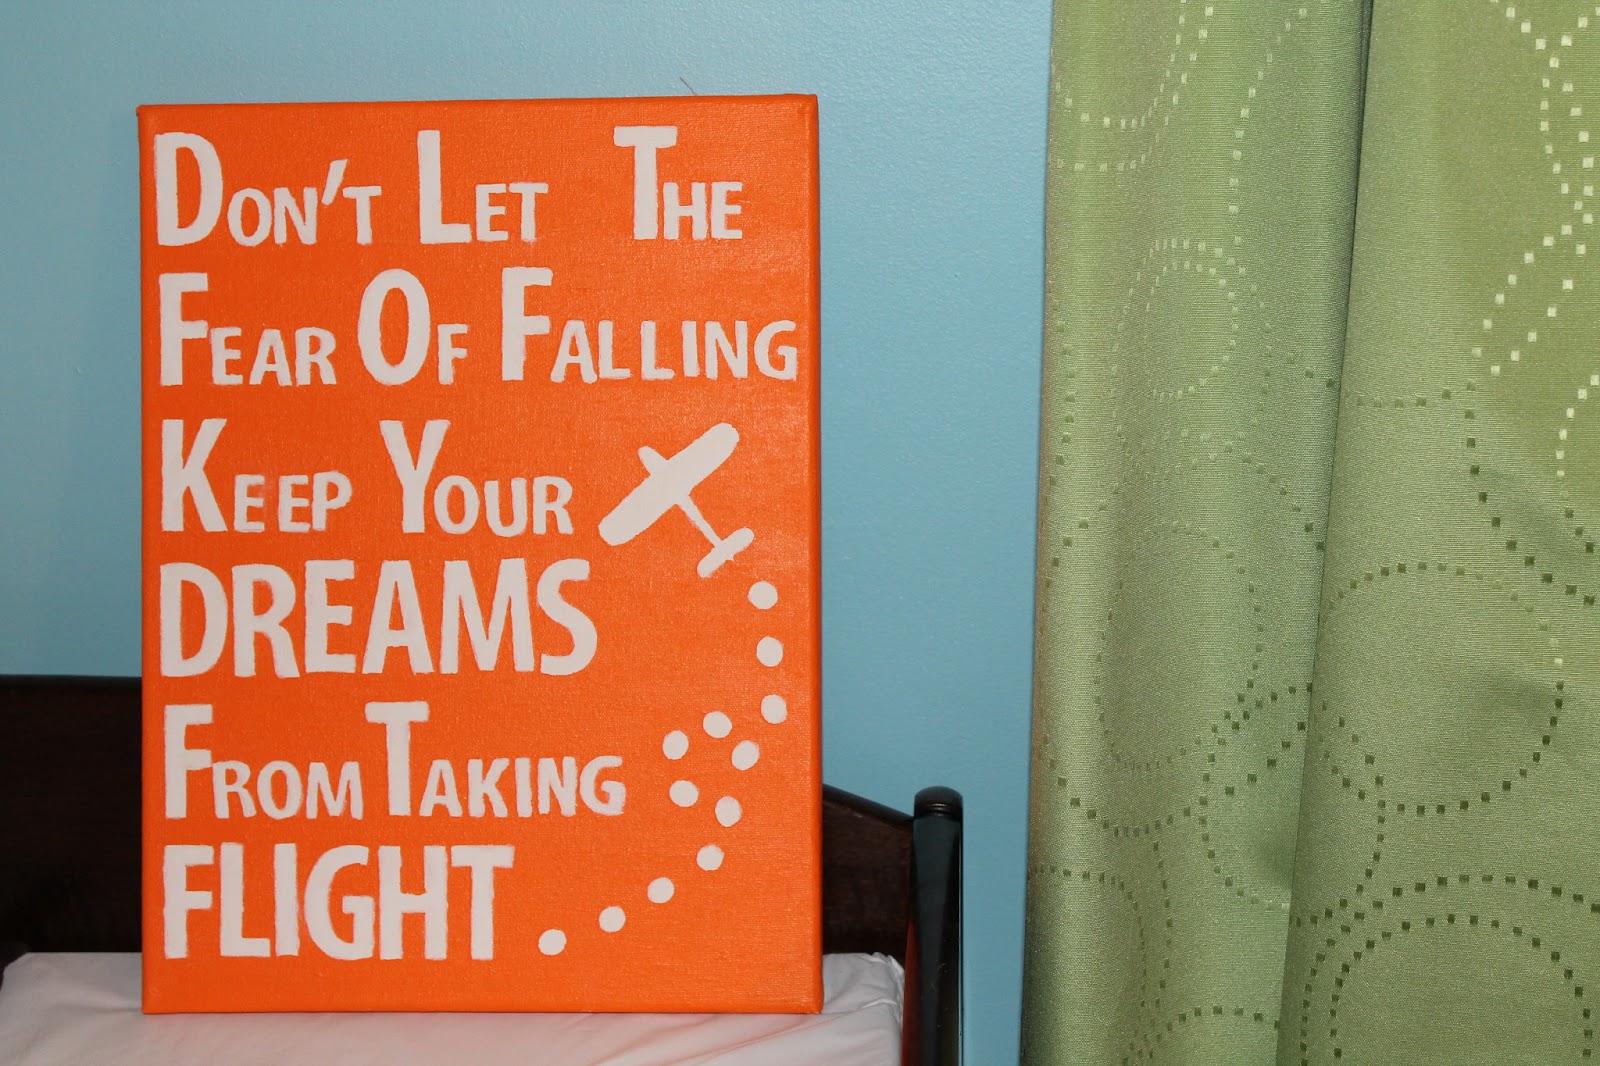
Custom Quote Wall Art

I really adore wall art in nurseries but it has been difficult for me to find pieces I love.  Unfortunately most of the airplane items I found for the nursery were way boyish so I decided to incorporate a plane in a gender-neutral way and I love it!

I was inspired by Brandy from the Heart and Habitat blog.  Here is her version of wall art that she painted with her kids, so cute!
Heart and Habitat Blog

First I bought a blank canvas at JoAnn Fabrics that was 50% off.

Since I don't have a Cricut, I had to use store bought vinyl letters which worked out perfectly with the sizes I needed.  It was tricky to find them at JoAnn Fabrics and I grabbed the only pack in stock but some other crafting stores may have more options.

After finding the quote I wanted, I cut out each letter (not precisely but enough to know the size of the letter) and arranged the quote the way I wanted it to read.

Because I wanted things to be symmetrical, I measured out lines with a ruler and pencil so that they were evenly spaced out.  Once that was finished I peeled off the vinyl backing and placed the stickers onto the canvas.  DO NOT DO THIS.  Unfortunately the paint was not dark enough to cover up the pencil lines so I highly suggest that you use painter's tape to map out the lines and remove as you do each line.
For the airplane, I just printed off an image online and traced it onto a sheet of contact paper I bought at Goodwill for $0.49!  For some reason they always have tons of contact paper so I was excited to finally have a reason to buy it.

Then I painted over it.  The orange is one of my favorite accent colors in the nursery!  As mentioned before, the pencil was showing through so I had to do 4 coats of paint to make sure to cover it up.  Without the pencil, I think I could have gotten away with only 2 coats.

Once it was dried, I peeled off each letter.  The paint bled through a little around the edges so I just touched up each letter by hand using white paint.
 

That's it.  The quote is in honor of the pilot. He's been through a challenging, stressful, long journey being a pilot that has even forced several of his friends to completely change careers.  Pursuing his dreams has taken a lot of patience, discipline and risk but it hasn't stopped him.  It's awesome to have a quote that we not only believe, but actually live by.

By the way, I started this project on one of my craft nights with one of my best friends Lauren.  She started her own blog The Lovely O.T. with some really great projects so be sure to check it out!
Related Posts Plugin for WordPress, Blogger...